When it comes to skincare, we often jump straight to the latest serum, trending mask, or miracle toner. But if there’s one non-negotiable in your beauty ritual, it’s this: facial cleansing is everything. Without a solid cleansing routine, every other product you apply is trying to work its magic on top of dirt, oil, and buildup.
And we’re not just talking about splashing your face with water or rubbing in a random cleanser. The truth is, cleansing is an art — one that involves steps, technique, and intention.
In this article, we’re diving into the 7 essential steps of facial cleansing — a complete, methodical approach that ensures your skin is deeply purified, balanced, and prepped to absorb the goodness of your skincare routine. Whether you’re a skincare novice or a seasoned glow-getter, this guide will elevate your facial cleansing game to a whole new level.
Step 1: Pre-Cleanse (Especially If You Wear Makeup or SPF)
What It Is: The pre-cleanse step involves using an oil-based cleanser or micellar water to dissolve makeup, sunscreen, and sebum before you go in with your regular face wash.
Why It Matters: Think of pre-cleansing as sweeping before mopping. It clears away the top layer of residue so your second cleanse can actually reach your skin. Skipping this step can lead to clogged pores, dullness, and breakouts — especially if you’re wearing long-wear foundation, waterproof mascara, or heavy SPF.
How To Do It:
-
Use a cleansing oil, balm, or micellar water.
-
Apply on dry skin and massage in circular motions.
-
Focus on areas with heavy makeup (eyes, lips, forehead).
-
Wipe off gently with a damp microfiber cloth or rinse with lukewarm water.
Pro Tip: Even if you don’t wear makeup, pre-cleansing is a great way to remove pollution, dirt, and excess oils that build up throughout the day.
Step 2: Cleanse (The 60-Second Rule Way)
What It Is: This is the main cleansing step, where you use a water-based cleanser to wash away all remaining dirt, grime, and oil.
Why It Matters: This step ensures your pores are cleared and your skin is fresh and ready for treatment. The 60-second rule, as we discussed in our previous article, suggests massaging your cleanser into your skin for a full minute to allow the product to work its magic.
How To Do It:
-
Choose a gentle, pH-balanced cleanser suited to your skin type.
-
Apply on damp skin and massage gently using your fingertips.
-
Focus on the nose, chin, hairline, and jawline.
-
Rinse thoroughly with lukewarm water.
Pro Tip: Avoid over-foaming cleansers if you have dry or sensitive skin. For oily or acne-prone types, look for ingredients like salicylic acid or tea tree oil.
Step 3: Exfoliate (2–3 Times a Week)
What It Is: Exfoliation involves removing dead skin cells from the surface to reveal a smoother, brighter complexion.
Why It Matters: Our skin naturally sheds dead cells, but that process slows down with age, stress, and environmental damage. Without exfoliation, your skin can look dull, rough, and uneven — and your products won’t penetrate as effectively.
Types of Exfoliators:
-
Physical exfoliants: Scrubs, brushes, or tools with granules.
-
Chemical exfoliants: AHAs (like glycolic acid), BHAs (like salicylic acid), or enzymes.
How To Do It:
-
Apply your exfoliant after cleansing.
-
If using a scrub, massage gently in circular motions for 30–60 seconds.
-
For chemical exfoliants, follow label instructions carefully — no need to rinse unless directed.
Pro Tip: Don’t overdo it. 2–3 times per week is plenty. Over-exfoliating can damage your skin barrier, leading to redness and sensitivity.
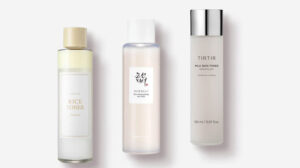
Step 4: Tone
What It Is: Toners help rebalance your skin’s pH, remove any leftover residue, and prepare your skin to absorb serums and moisturizers more effectively.
Why It Matters: Many cleansers can disrupt your skin’s natural acidity. A toner helps neutralize that imbalance, hydrate your skin, and add an extra layer of freshness.
How To Do It:
-
Choose a toner suited to your skin’s needs — hydrating, clarifying, soothing, etc.
-
Apply with a cotton pad or pat in using your fingers.
-
Focus on the T-zone and areas prone to buildup.
Pro Tip: Go alcohol-free. Modern toners are nothing like the harsh, astringent ones from the past. Look for ingredients like rose water, witch hazel, chamomile, or hyaluronic acid.
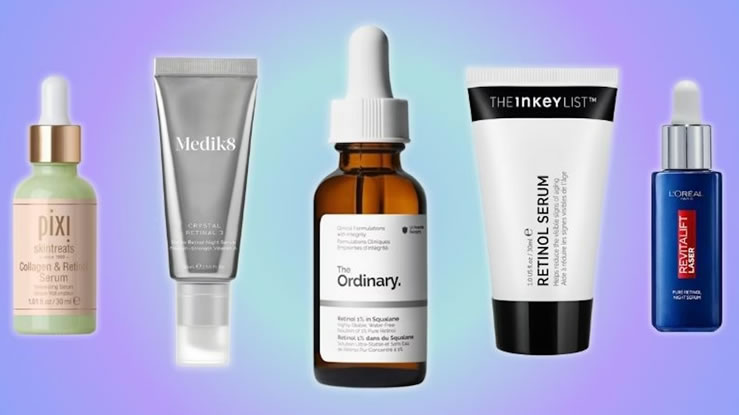
Step 5: Treat (Serums & Spot Treatments)
What It Is: This is where you apply concentrated treatments like serums, ampoules, or acne spot creams.
Why It Matters: After cleansing, your skin is like a sponge — clean, soft, and ready to absorb. Treatments at this stage penetrate deeper and work more effectively.
Popular Treatments:
-
Vitamin C for brightening
-
Niacinamide for oil control and texture
-
Retinol for anti-aging
-
Hyaluronic Acid for hydration
-
Salicylic Acid or Benzoyl Peroxide for acne
How To Do It:
-
Apply a few drops or a small amount to your fingertips.
-
Gently pat or press into your skin — don’t rub.
-
Let each layer absorb before adding another.
Pro Tip: Layer serums from thinnest to thickest consistency. Use no more than 2–3 actives per routine to avoid irritation.
Step 6: Moisturize
What It Is: Moisturizing helps lock in hydration, repair the skin barrier, and keep your skin feeling soft and supple.
Why It Matters: No matter your skin type — even oily or acne-prone — you need a good moisturizer. It seals in the benefits of everything you’ve applied so far and prevents water loss.
How To Do It:
-
Choose a moisturizer based on your skin needs (gel for oily skin, cream for dry, etc.).
-
Use a pea-sized amount and apply to your face and neck.
-
Gently massage in upward strokes until fully absorbed.
Pro Tip: Look for moisturizers with ingredients like ceramides, peptides, glycerin, or squalane for long-lasting hydration.
Step 7: Protect (Morning) or Nourish (Night)
Daytime: Sunscreen
What It Is: Sunscreen protects your skin from harmful UV rays that cause premature aging, pigmentation, and even cancer.
Why It Matters: Skipping sunscreen renders all your efforts pointless. UV damage breaks down collagen, worsens dark spots, and accelerates aging. It’s the most important anti-aging step in your routine.
How To Do It:
-
Use a broad-spectrum SPF 30 or higher.
-
Apply as the last step of your morning routine, before makeup.
-
Reapply every 2–3 hours if exposed to the sun.
Nighttime: Sleeping Mask or Facial Oil
What It Is: These are nourishing treatments designed to work while your body is in repair mode overnight.
Why It Matters: Skin regenerates while you sleep. A night cream, oil, or sleeping mask supports this process and wakes you up with refreshed, glowing skin.
How To Do It:
-
Choose a nourishing formula — look for ingredients like peptides, ceramides, rosehip oil, or retinol.
-
Apply as your final step after moisturizing.
Pro Tip: Don’t combine too many heavy products at night — your skin still needs to breathe.
Bonus Tips for the Best Cleansing Routine
💧 Use lukewarm water — Too hot or too cold can stress your skin.
🧼 Keep your towels clean — Always pat dry with a fresh, soft towel.
⏳ Don’t rush — Skincare is self-care. Enjoy the process.
📆 Be consistent — Results come from regular care, not one perfect day.
The Ideal 7-Step Facial Cleansing Routine (Recap)
| Step | Product Type | Frequency |
|---|---|---|
| 1 | Oil cleanser / Micellar Water | Daily (PM) |
| 2 | Gentle cleanser | Twice daily |
| 3 | Exfoliant | 2–3 times/week |
| 4 | Toner | Twice daily |
| 5 | Treatment serum | Once or twice daily |
| 6 | Moisturizer | Twice daily |
| 7 | Sunscreen / Night cream | Daily (AM/PM) |
Facial cleansing isn’t just the first step in your skincare routine — it’s the foundation. A proper cleansing ritual transforms your skin and enhances the performance of every other product you use.
When you approach cleansing as a 7-step ritual — not a quick splash-and-go — you’re telling your skin it deserves care, attention, and respect. And your skin will thank you for it with radiance, clarity, and strength.
Whether you’re dealing with breakouts, dullness, or sensitivity, remember: it all starts with the way you cleanse.
Related Article