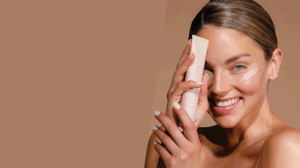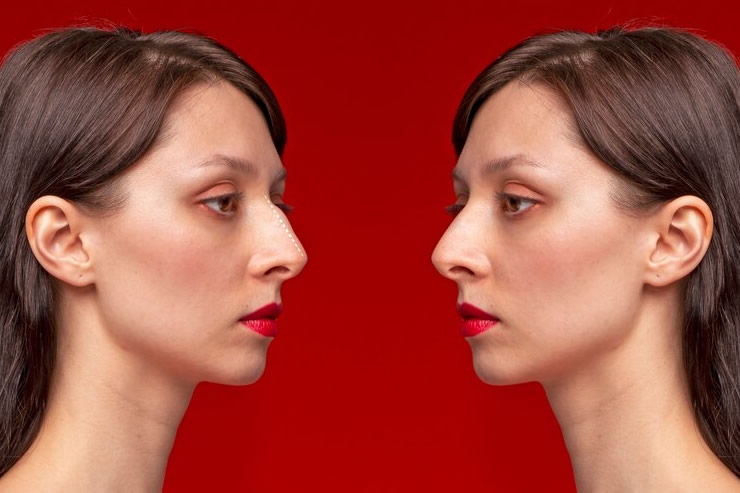
Vintage inspired makeup has long been admired for its elegant charm and timeless appeal. One of the signature elements of this look is dramatic, fluttery lashes that frame the eyes and elevate the entire makeup. Doting Beauty offers lashes designed for comfort, confidence, and that classic vintage vibe. Their signature faux mink styles are lightweight, flexible, and built to enhance your natural beauty whether you are aiming for soft glam or old Hollywood mood. This guide will walk you through how to apply your Doting Beauty lashes like a pro and achieve the ultimate vintage inspired look, complete with preparatory steps, application hacks, and finishing touches.
Choose the Right Lash Style
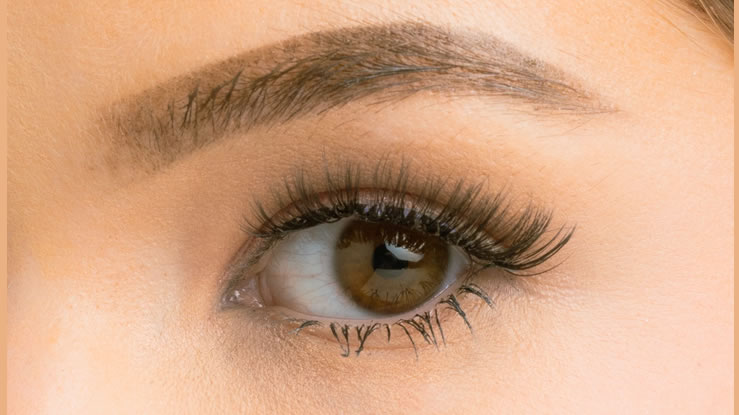
The first step toward a vintage inspired lash look is selecting the right lash. Doting Beauty lashes range from soft glam to more dramatic options. For a classic vintage feel, choose lashes that are slightly longer at the outer edges. This creates a subtle wingline effect that mimics the iconic lash shapes seen in old Hollywood. Most vintage inspired lashes feature visible separation, soft lift, and subtle length rather than extreme thickness or overly spiky design.
Read Also>>>Review of Doting Beauty by Brooke Monk
Pairing the right lash style with your eye shape makes application easier and enhances the overall effect. Those with wide set eyes may choose slightly longer lashes toward the center, while almond shaped eyes can carry a uniform volume more naturally.
Prepare Your Natural Lashes
Good application always begins with preparation. Start by curling your natural lashes gently to give them lift. This base curl helps your false lashes sit more naturally on your lash line. Applying mascara before lash application adds grip so your natural and fake lashes blend together more seamlessly. The key to vintage looks often lies in combining curl with definition, so do not skip this step.
Measure and Trim for a Perfect Fit
False lashes are rarely the exact width of every eye, so trimming is essential. Remove your chosen Doting Beauty lashes from the tray carefully without bending or damaging them. Place the lash strip along your lash line to check the fit. Use small lash scissors to trim excess from the outer edge only. Cutting from the outer edge preserves the natural taper and helps the lashes sit comfortably without poking at the inner corner.
For a vintage aesthetic, a slightly tapered lash can help lift the eye shape and create a subtle flirtatious curve toward the outer eye.
Apply Lash Adhesive the Right Way
Applying adhesive correctly is crucial to secure and lasting wear. Spread a thin line of lash glue along the lash band rather than applying a heavy strip. Let the glue sit for about 30 seconds so it becomes tacky. This touch window is key to preventing slipping or sliding, ensuring the lashes adhere on the first placement.
Avoid applying wet glue directly onto the lid or too close to the waterline. Instead focus on the lash band itself. Waiting for tackiness gives the expert precision needed to place lashes close to your natural lash line.
Place the Lashes With Precision
Once the adhesive is tacky, use tweezers or a lash applicator to hold the lashes. Position the center of the lash band first, then secure the inner and outer corners. Applying the lashes close to your natural lash line gives a cleaner vintage look and keeps the lashes from lifting at the edges.
Tilt your head slightly back and look down into a mirror to see the lash line more clearly. This angle makes it easier to place the strip without knocking off your brow makeup or shadow.
Blend With Natural Lashes
After placement, gently press the false lashes and your natural lashes together with your fingertips or an applicator. This step merges the two sets into a seamless lash line. If there is space between the lash band and your lid, use eyeliner to fill and disguise any visible strip. Doing this enhances the vintage inspired effect with a polished finish.
Curling the lashes again lightly at the base can also help lift and blend the natural and false lashes for a fuller look.
Pair With Vintage Makeup Elements
Vintage inspired lashes shine most when paired with classic makeup features. A crisp winged eyeliner helps define the eye shape, giving context to the flutter of lashes. Bold brows with defined arches contribute to that retro glamour feel. For a more complete vintage vibe, consider a soft matte eyeshadow base with neutral shades and a bold red or deep berry lip to complete the overall aesthetic.
Removal and Care for Reuse
Removing false lashes with care extends their life and keeps them reusable. Gently lift the outer edge with your fingers or tweezers. Avoid pulling or tugging at the band, which may damage the lashes or your natural lashes. Clean the lash band by removing remaining adhesive and store them in their original tray. With proper care, Doting Beauty lashes can be worn up to twenty times each.
Proper maintenance ensures that your investment in classic vintage inspired lashes continues to pay off over multiple wearings.
Achieving a vintage inspired lash look with Doting Beauty lashes does not require perfection, only patience and attention to detail. The key steps include choosing the right lashes, preparing natural lashes, trimming for fit, applying glue with precision, and blending the fake lashes with your own. Pairing these lashes with classic makeup elements amplifies the retro charm.
With practice, false lash application becomes easier and more intuitive. Whether you are aiming for subtle everyday glamour or full old Hollywood style, these steps guide you to that timeless vintage allure with confidence and comfort.